
English 

Views: 0 Author: Site Editor Publish Time: 2026-09-08 Origin: Site


The shift from plastic to metal food storage is driven by a need for unmatched durability, non-toxicity, and long-term lifecycle value. Realizing these benefits requires strict adherence to specific maintenance protocols. Improper cleaning methods—such as using incorrect detergents, highly abrasive materials, or neglecting gasket care—can compromise vacuum seals, cause irreversible pitting, and harbor dangerous bacteria. These missteps effectively ruin a premium investment. This guide provides an evidence-based framework for cleaning, sanitizing, and maintaining Stainless Steel Food Storage Containers. We cover everything from initial preparation to deep cleaning techniques. By implementing these field-tested practices, you ensure optimal hygiene, preserve structural integrity, and maximize your long-term return on investment without relying on harsh chemicals.
Initial Preparation is Mandatory: New containers often harbor invisible manufacturing oils and polishing compounds that must be stripped before first use.
Chemical Sensitivities: Chlorides (found in bleach) and highly abrasive cleaners cause irreversible pitting corrosion in stainless steel and must be strictly avoided.
Component-Specific Care: The metal body, silicone gaskets, and specialized lids require distinct cleaning approaches to prevent degradation.
Thermal Considerations: While high-quality stainless steel withstands high heat, vacuum stainless containers and glass components are susceptible to thermal damage or compromised seals in commercial dishwashers.
Preventative Maintenance: Routine descaling with mild acids (like white vinegar) prevents mineral buildup and preserves the chromium oxide layer that keeps stainless steel rust-free.
A properly maintained stainless steel container must meet strict success criteria to remain functional and safe over years of continuous use. It must remain completely rust-free, retain 100% airtight and watertight seal integrity, and harbor zero residual odors or biofilms. When these criteria are met, the container performs exactly as designed, keeping food fresh and preventing cross-contamination. Achieving this baseline requires understanding the physical properties of the materials involved.
The defining characteristic of stainless steel is its chromium oxide layer. This microscopic, invisible barrier forms naturally when the chromium in the steel reacts with oxygen in the air. This layer is what makes the steel "stainless." It acts as a shield against water and corrosive elements. Remarkably, this layer is self-healing. If the surface is lightly scratched, newly exposed chromium reacts with oxygen to repair the barrier. However, improper cleaning methods strip this protective layer faster than it can regenerate. Exposure to harsh chemicals, particularly chlorides, or aggressive scrubbing with abrasive materials prevents the chromium oxide from reforming. Once the barrier is breached, the underlying iron is exposed to moisture, leading directly to oxidation and rust.
The cost of maintenance failure extends beyond simple aesthetics. Replacing premium containers due to preventable damage impacts both operational efficiency and budgets. Warped plastic lids lose their ability to snap securely onto the metal base. Degraded silicone gaskets harden, crack, and fail to block air and moisture, leading to premature food spoilage. Compromised thermal retention in insulated models renders them useless for temperature-sensitive transport. By understanding the science behind the materials, users can implement cleaning strategies that protect the container's structural and functional integrity.
In heavy-use environments, the difference between a container that lasts ten years and one that fails in ten months comes down to daily habits. Throwing a stainless pan into a sink full of bleach water might seem like a quick sanitization shortcut, but it initiates microscopic pitting that ruins the steel. Training yourself or your staff to recognize these material vulnerabilities is the first step in protecting your equipment.
Establishing a baseline cleaning routine prevents the accumulation of stubborn residues and protects the metal finish. Standard protocols cover everything from unboxing the product to daily washing and proper storage.
New containers rarely arrive ready for immediate food contact. The manufacturing process leaves behind residual black polishing compounds, machine oils, and fine metal dust. Washing with standard dish soap is often insufficient to cut through these industrial residues. To properly prep a new container, follow these specific steps:
Unpack the container and remove all interior packaging materials, including silica gel packets and cardboard inserts.
Create a thick paste using three parts baking soda and one part warm water, adding a few drops of pH-neutral dish soap.
Apply this paste to the interior and exterior surfaces using a soft microfiber cloth.
Rub gently along the visible grain of the metal. The mild abrasiveness of the baking soda lifts the oils without scratching the finish.
Rinse thoroughly with hot water until the water runs clear and no gritty residue remains.
Towel dry immediately to prevent initial water spotting.
Manufacturer adhesive labels present another initial challenge. Scraping labels with metal tools or abrasive pads will permanently scratch the steel. Instead, saturate the label with standard cooking oil or rubbing alcohol. Allow the liquid to penetrate the paper and dissolve the adhesive backing for ten minutes. The label will peel away cleanly. Wipe away any remaining residue with a microfiber cloth.
Daily handwashing remains the safest and most effective method for cleaning metal food storage. Utilize warm water and a high-quality, pH-neutral dish soap. Avoid soaps containing citrus additives or heavy degreasers, as prolonged exposure can dull the metal finish. Tool selection is equally important. Stick to non-abrasive options such as microfiber cloths, soft nylon brushes, or standard cellulose sponges. When scrubbing, always move the cloth or sponge in the same direction as the visible grain of the stainless steel. Scrubbing across the grain traps microscopic food particles in the grooves and dulls the surface sheen.
While many single-wall stainless steel bases are rated for dishwasher use, frequent mechanical washing carries long-term implications. Commercial and residential dishwasher detergents are highly alkaline. Over time, this alkalinity, combined with high heat and prolonged water exposure, can degrade the passive chromium oxide layer and dull the exterior finish.
Cleaning Method | Impact on Stainless Steel Base | Impact on Lids & Gaskets | Best Use Case |
|---|---|---|---|
Handwashing (pH Neutral Soap) | Preserves finish and chromium oxide layer indefinitely. | Extends lifespan of silicone and prevents plastic warping. | Daily use for all container types, especially vacuum insulated models. |
Residential Dishwasher (Top Rack) | May dull exterior finish over several years of use. | Safe for most plastics and silicone if kept away from heating elements. | Convenience cleaning for single-wall bases and standard lids. |
Commercial Dishwasher (High Heat/Chemicals) | Accelerates finish degradation; risk of chemical pitting. | High risk of warping plastic lids and degrading silicone elasticity. | Heavy volume environments; requires frequent gasket replacement. |
If utilizing a dishwasher, placement strategies are necessary to protect accompanying components. Silicone gaskets and plastic locking lids must always be placed on the top rack, as far away from the primary heating element as possible. Bottom-rack placement exposes these materials to intense, localized heat, causing the plastic to warp and the silicone to lose its elasticity. Once a lid warps, it will never again form a proper airtight seal with the metal base.
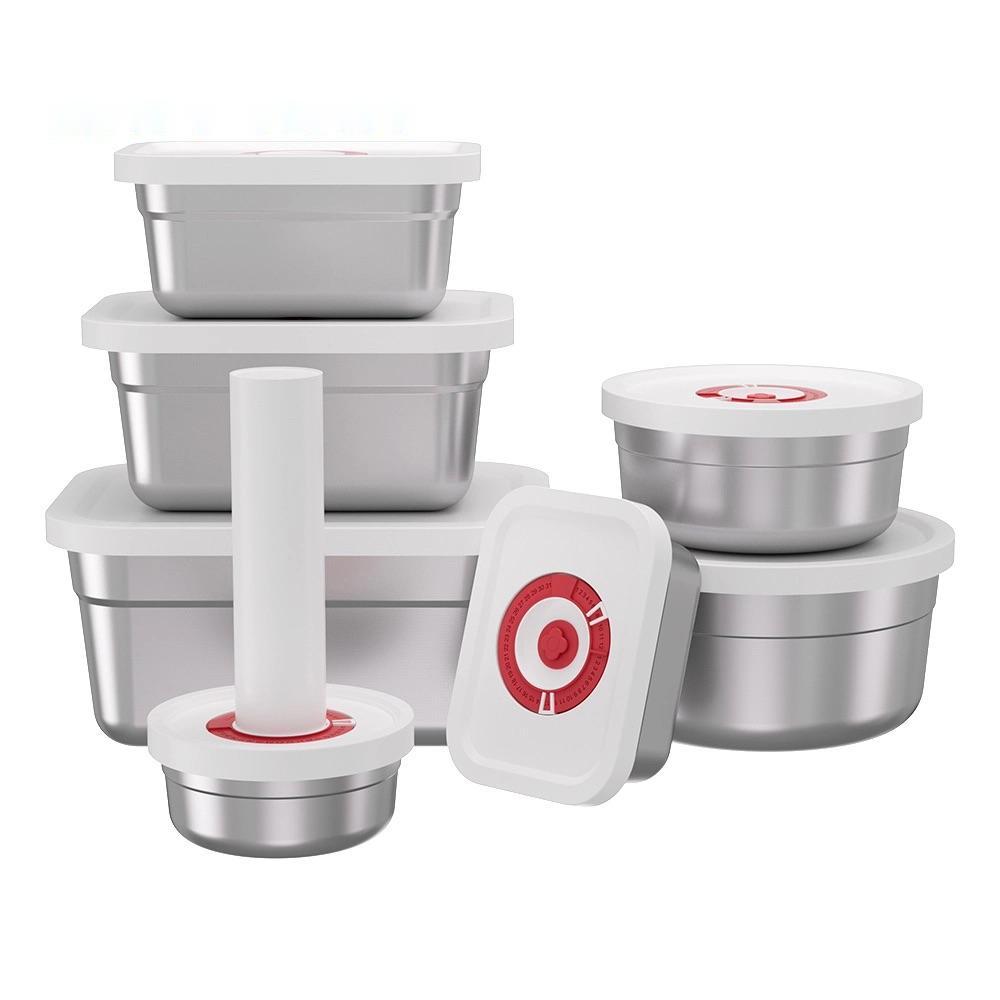
Washing is only half the maintenance equation; drying and storage dictate the long-term hygiene of the container. Allowing containers to air-dry naturally often results in water spots. These spots are actual mineral deposits—calcium and magnesium—left behind as the water evaporates. Over time, these deposits calcify, creating a rough surface that traps bacteria and initiates localized corrosion. To prevent this, implement immediate, thorough towel-drying using a clean, lint-free cloth.
Storage environment directly impacts odor retention and mold growth. Never store a container fully sealed with the lid locked in place. Even microscopic amounts of residual moisture trapped inside a sealed, dark environment will facilitate mold growth and create stale, musty odors. Store the metal bases and lids separately, or place the lid loosely on top without engaging the locking mechanisms, ensuring adequate airflow.
Different container architectures demand specific handling. Applying standard single-wall cleaning methods to specialized units often results in permanent damage. Understanding the physical limitations of your specific equipment prevents costly replacement cycles.
Insulated containers rely on a vacuum-sealed space between two walls of steel to prevent heat transfer. This architecture introduces severe insulation vulnerabilities during the cleaning process. The vacuum seal is typically secured at a small point on the exterior base of the container. Submerging the entire base in a sink full of water, or running it through a high-heat dishwasher cycle, can compromise this seal. The heat causes the metal to expand, potentially breaking the vacuum point and allowing water or air to enter the void. Once the vacuum is broken, the container permanently loses its thermal retention capabilities.
Maintaining vacuum stainless containers requires targeted cleaning. Wash the interior using hot water, mild soap, and a long-handled bottle brush to reach the bottom corners. For the exterior, rely on spot-cleaning with a damp cloth. Never soak the base, and keep heavy streams of water away from the exterior vacuum valve. Additionally, harsh scrubbing on the exterior can strip away specialized powder-coated or painted finishes.
Containers featuring glass components require careful temperature management to prevent thermal shock. Thermal shock occurs when glass experiences a rapid, extreme change in temperature, causing different parts of the material to expand or contract at different rates. Moving a glass lid directly from a freezing environment into a sink of scalding hot soapy water creates intense internal stress, leading to micro-fractures or complete shattering. Always allow glass lids to rest at room temperature for at least fifteen minutes before washing.
The primary advantage of glass lid stainless containers is visibility, allowing users to identify contents without breaking the seal. However, this introduces a maintenance trade-off. The junction where the clear glass meets the silicone gasket and the metal or plastic rim creates a tight crevice. Liquids and fine food particles easily penetrate this barrier. Thorough sanitation requires the complete disassembly of these components during routine washing to prevent hidden bacterial growth.
The metal base of a container is naturally non-porous, making it highly resistant to bacterial colonization. The weak point in any food storage system is the flexible sealing mechanism. Neglecting the gaskets leads to compromised food safety regardless of how clean the steel base is.
Removable silicone gaskets create an airtight environment, but they also create a physical trap. Moisture, starches, and proteins get forced beneath the silicone ring when the lid is compressed. If the gasket is not removed during washing, this trapped organic matter becomes a breeding ground for bacteria and mold. Over time, these microorganisms secrete a slimy matrix known as a biofilm. Biofilms are highly resistant to standard dish soap and water, causing persistent foul odors and cross-contamination of fresh food.
Removing the gasket is mandatory, but it must be done carefully. Silicone is pliable but susceptible to micro-tears and puncturing. Never use sharp tools like standard kitchen knives, forks, or metal skewers to pry the gasket out of its channel. A single scratch in the silicone creates a permanent harbor for bacteria and weakens the structural integrity of the seal, eventually leading to snaps or leaks.
Locate the small notch or groove typically designed into the lid channel for gasket removal.
Insert a blunt tool, such as a rounded butter knife, a plastic spudger, or a specialized blunt gasket pick, under the silicone ring.
Gently lift the ring upward, working your way around the perimeter until the gasket pops free.
Wash the silicone ring separately in hot, soapy water, massaging it gently to remove surface oils.
Scrub the empty lid channel thoroughly with a small nylon brush to remove any accumulated debris.
Allow both the lid and the gasket to dry completely before reassembly.
Silicone is slightly porous and readily absorbs strong food odors, particularly from garlic, onions, and heavy spices. Standard washing rarely removes these embedded smells. To neutralize odors, create a soaking solution of warm water and baking soda. Submerge the extracted silicone gaskets in this solution for several hours or overnight. Baking soda acts as a natural deodorizer by neutralizing acidic and basic odor molecules.
For highly stubborn smells, a white vinegar soak can break down lingering residues. After soaking and washing, utilize UV exposure. Leaving the silicone rings in direct sunlight for a few hours helps break down the remaining odor-causing compounds and provides a natural, mild sanitizing effect. Ensure the gaskets are completely dry before reinstalling them into the lids.
Even with rigorous daily maintenance, containers occasionally require aggressive intervention to handle high-risk foods, mineral buildup, or accidental damage. Knowing how to troubleshoot these issues extends the life of your equipment.
Storing raw poultry, meat, or unpasteurized dairy introduces a higher risk of dangerous pathogens like Salmonella or E. coli. Standard handwashing may not provide sufficient peace of mind. However, corrosive chemical sanitizers must be avoided. To safely disinfect the metal base, utilize thermal sanitation. Pouring boiling water into the container and letting it sit for five minutes effectively kills surface pathogens without introducing chemicals.
For a chemical alternative, use a 3% hydrogen peroxide solution. Spray the interior surfaces, allow it to sit for ten minutes, and then rinse thoroughly with hot water. Hydrogen peroxide breaks down into water and oxygen, leaving no toxic residue and causing no damage to the chromium oxide layer.
If you live in an area with hard water, chalky white stains will inevitably build up on the interior walls of the container. These calcium and magnesium deposits look unsightly and create a rough texture. Do not attempt to scrape them off. Instead, utilize a mild acid to dissolve the minerals. Mix a 1:1 solution of distilled white vinegar and warm water directly inside the container. Let the solution sit for twenty to thirty minutes. The acetic acid in the vinegar safely breaks down the calcification. Pour out the solution, wash lightly with dish soap, and towel dry immediately.
Issue | Root Cause | Safe Solution |
|---|---|---|
White Chalky Spots | Calcium/Magnesium from hard water evaporation. | Soak with a 1:1 solution of white vinegar and warm water. |
Surface Rust Spots | Iron particles transferred from other kitchen tools. | Buff gently with a baking soda and water paste along the grain. |
Stubborn Odors | Food compounds trapped in the porous silicone gasket. | Extract gasket, soak in baking soda solution, and air dry in sunlight. |
Burnt-On Residue | Polymerized fats or overcooked proteins stuck to the base. | Boil water with dish soap inside the container; let soak before wiping. |
Cloudy Glass Lids | Starch buildup or hard water etching. | Scrub with a paste of white vinegar and baking soda, then rinse. |
True high-quality stainless steel rarely rusts on its own. If you spot orange or brown flecks, it is usually "transfer rust." This occurs when the container rubs against a non-stainless steel item, like a cast iron pan or a cheap metal utensil, in the sink or dishwasher. The iron particles transfer to the stainless surface and oxidize.
To remove transfer rust, create a thick paste of baking soda and water. Apply it to the rust spots and use a soft cloth or a non-abrasive sponge to rub the area. Always rub parallel to the metal grain. The baking soda is abrasive enough to remove the surface oxidation but gentle enough to leave the passive layer intact. If the metal has actual pitting—small, deep craters in the steel—this indicates chemical damage from chlorides. Pitting is irreversible, and heavily pitted containers should be retired if they compromise food safety.
If a container was used for reheating or exposed to extreme heat, fats and proteins can polymerize and bond tightly to the steel. Scrubbing with heavy force will damage the finish. Instead, use heat and surfactants to lift the residue. Fill the container with enough boiling water to cover the burnt area and add a few drops of concentrated dish soap. Allow the mixture to sit until the water cools to room temperature. The hot water softens the polymerized bonds, and the soap breaks down the fats, allowing you to wipe away the residue with a standard sponge.
Protecting your investment requires knowing exactly what destroys it. A few common kitchen practices can ruin a stainless container in a single afternoon. Avoiding these hazards is just as important as following proper cleaning protocols.
Never use bleach or any cleaner containing sodium hypochlorite on stainless steel. The chemical reaction between chlorides and stainless steel is immediate and destructive. Chlorides aggressively attack and dissolve the protective chromium oxide layer. Once the layer is breached, the bleach begins eating into the raw steel, causing rapid, localized pitting corrosion. A container soaked in a bleach solution will develop permanent micro-craters and rust spots that cannot be repaired. Always opt for hydrogen peroxide, boiling water, or quaternary ammonium sanitizers formulated specifically for food-contact surfaces.
Steel wool, heavy-duty scouring pads, and wire brushes are strictly prohibited. These tools inflict deep scratches into the surface of the metal. These scratches create microscopic crevices where bacteria, moisture, and food particles accumulate, making complete sanitation impossible. Furthermore, standard steel wool sheds microscopic iron splinters during use. These splinters embed themselves into the stainless steel surface and immediately begin to rust when exposed to water, creating widespread transfer rust across the container.
While stainless steel is highly resistant to food acids, prolonged exposure without cleaning degrades the passive layer. Storing highly acidic foods—such as tomato sauces, citrus-based marinades, or vinegar pickles—or highly saline foods for extended periods stresses the chromium oxide barrier. If you store these types of foods, ensure you transfer them to different containers periodically or wash the primary container thoroughly between uses to allow the passive layer to breathe and regenerate.
To immediately improve your container maintenance and protect your equipment, take the following next steps:
Audit your current cleaning supplies and permanently remove steel wool and chloride-based sanitizers from your sink area.
Perform an initial deep clean on all newly purchased containers using the baking soda paste method to strip manufacturing oils.
Establish a weekly routine maintenance schedule to extract, inspect, and sanitize all silicone seals to prevent biofilm buildup.
Implement immediate towel-drying protocols to eliminate hard water calcification and preserve the metal's finish.
A: This black residue consists of harmless but stubborn manufacturing oils and polishing compounds left over from the factory. Standard dish soap often fails to remove it. Before first use, create a paste of baking soda, warm water, and dish soap. Rub the interior and exterior thoroughly with a soft cloth along the grain, then rinse with hot water.
A: Single-wall stainless steel bases are generally dishwasher safe, though handwashing preserves the finish longer. Vacuum insulated containers are strictly not dishwasher safe, as high heat compromises the vacuum seal. Always place plastic lids and silicone gaskets on the top rack to prevent heat warping.
A: Silicone absorbs strong food odors over time. Carefully extract the gasket using a blunt tool. Submerge the silicone ring in a solution of warm water and baking soda for several hours. Wash it thoroughly, then let it air dry in direct sunlight, as UV rays help break down lingering odor compounds.
A: No. Bleach contains sodium hypochlorite, which aggressively attacks the protective chromium oxide layer on stainless steel. This causes rapid, irreversible pitting corrosion and rust. To sanitize safely, use boiling water or a 3% hydrogen peroxide solution, which disinfects without damaging the metal.
A: High-quality stainless steel rarely rusts. You are likely seeing "transfer rust," caused by iron particles rubbing off non-stainless items like cast iron or cheap utensils in the sink. Remove these spots by gently buffing the area with a baking soda and water paste, moving parallel to the metal's grain.
A: Vacuum containers must be hand-washed only. Never submerge the entire base in water, as this can force moisture into the exterior vacuum seal point. Spot-clean the outside with a damp cloth and use a long-handled bottle brush with warm soapy water to clean the interior.
A: Never use steel wool. It permanently scratches the surface, creating crevices for bacteria, and leaves behind microscopic iron particles that cause rust. Instead, fill the container with boiling water and a drop of dish soap. Let it soak until cool to lift the polymerized fats safely.


