
English 

Views: 0 Author: Site Editor Publish Time: 2026-09-13 Origin: Site


Undetected seal failures in food storage create severe operational and financial risks. Accelerated spoilage ruins inventory. Cross-contamination compromises entire batches. Failed seals disrupt transport logistics and introduce severe food safety hazards. You must know exactly when a container is truly sealed.
Traditional thermal glass canning provides a distinct, loud metal "pop" when a vacuum forms. Mechanical plastic vacuum sealing lacks this obvious auditory cue. Flexible or semi-rigid plastics do not behave like metal lids. This structural difference makes it difficult to visually confirm a vacuum. Users often experience false confidence, believing a container is sealed when ambient air is slowly leaking back inside.
You need a standardized, multi-point evaluation framework to verify seal integrity. This technical approach works for both commercial procurement and rigorous domestic use. We will break down exactly how to test, audit, and maintain these storage systems to guarantee absolute airtight performance.
Visual Deflection and Tactile Firmness are Primary: A reliable seal in plastic containers is indicated by a concave lid, a depressed vacuum valve, and a center lid that yields no movement when pressed.
Tactile Resistance Validates Integrity: Attempting to lift the lid without releasing the valve should result in significant physical resistance; any slippage indicates a compromised gasket.
Maintenance Dictates Lifespan: Seal failures are rarely due to the vacuum mechanism itself, but rather particulate interference, silicone gasket degradation, or plastic warping from improper thermal exposure.
Material Selection Matters: Commercial applications require rigid polymers (like Tritan) to maintain structural integrity under sustained negative pressure without micro-cracking.
Safety First: If a seal's integrity is in reasonable doubt, the contents must be discarded; never rely on taste-testing to verify the safety of compromised negative pressure food containers.
Mechanical pumps extract air through a specialized one-way valve. You can use handheld manual pumps or electric vacuum sealers for this process. The pump physically pulls oxygen molecules out of the closed environment. This contrasts sharply with the thermal cooling method used in traditional glass canning. Thermal canning relies on heat to expand air and steam to drive it out. As the jar cools, the remaining air contracts, pulling the metal lid down.
Mechanical extraction creates negative pressure inside semi-rigid plastic environments. Once you remove the internal air, the pressure drops below the atmospheric level outside the container. Ambient air pressure then pushes down heavily on the lid. This heavy atmospheric weight physically locks the lid in place against the base. The greater the air extraction, the stronger the atmospheric lock becomes. Understanding this pressure differential is the foundation of verifying any seal.
Feature | Mechanical Vacuum (Plastic) | Thermal Vacuum (Glass Canning) |
|---|---|---|
Air Removal Method | Physical extraction via pump | Heat expansion and cooling contraction |
Primary Indicator | Valve depression and lid deflection | Audible metal "pop" and concave lid |
Material Flexibility | Semi-rigid to rigid polymers | Rigid glass with flexible metal lids |
Reusability | High (valves and gaskets reset) | Low (metal lids are single-use for sealing) |
Temperature Requirement | Room temperature or cold | High heat (boiling or pressure canning) |
A reliable seal depends on the precise interaction between three components. You have the container rim, the silicone gasket, and the locking clasps. The container rim provides a flat, rigid surface. The silicone gasket sits inside the lid channel. When atmospheric pressure pushes the lid down, it compresses the silicone gasket against the rim. This compression fills microscopic gaps and creates an airtight barrier. Locking clasps help maintain initial alignment before you apply the vacuum.
The central one-way silicone valve maintains the pressure differential. This small component is the gatekeeper of the entire system. During extraction, the pump pulls the silicone valve upward slightly. This allows air to escape. The moment pumping stops, ambient air pressure slams the valve shut. The valve seals tightly against its plastic housing. It prevents any outside air from rushing back into the container. If this valve degrades, tears, or accumulates debris, the entire vacuum system fails instantly.
You can verify a seal by sighting the lid at eye level. Place the container on a flat counter. Crouch down so your eyes align with the lid. A properly sealed lid exhibits a slight, uniform inward bow. We call this a concave shape. The atmospheric pressure physically bends the plastic downward. If the lid remains perfectly flat, you do not have a sufficient vacuum.
Next, perform the tactile press test to confirm structural rigidity. Follow these exact steps:
Place the container on a stable, flat surface.
Position your thumb directly over the center of the lid, avoiding the release valve.
Apply firm, downward pressure.
Evaluate the feedback. A secure seal feels completely solid and unyielding.
The atmospheric pressure has already pushed the plastic down as far as it can go. If the lid moves up and down, you have a problem. If it clicks or pops back against your thumb, the vacuum has failed. Note the limitations of this test on highly rigid plastics. Heavy-duty polymers resist bending. Deflection and movement are minimal in these materials. You must rely on other indicators if you use ultra-rigid storage solutions.
Inspect the central vacuum indicator closely. The silicone valve should sit flush or slightly recessed into the lid housing. When you extract air, the pressure pulls the center of the valve downward. This creates a visible dimple effect.
This dimple is a primary visual cue of active negative pressure. If the valve looks domed or sits higher than the surrounding plastic, air has entered the container. Train your kitchen staff to check for this dimple before moving any stored items. A flat or bulging valve means the seal is broken. You must re-vacuum the container immediately if the food is still safe.
You must perform a physical pull test to validate gasket integrity. First, unlatch all side clips if your container uses them. The clips are only for alignment, not for holding the vacuum. Gently pull upward on the edges of the lid. Use steady, even force.
The lid must remain firmly attached to the base. It should be capable of lifting the base's weight entirely. Depending on the size of the container, you can lift the whole unit just by holding the lid. The silicone gasket must not break contact with the rim. If you feel any slippage or hear air rushing in, the gasket has failed. A strong vacuum creates immense pull resistance. Lack of resistance means lack of a seal.
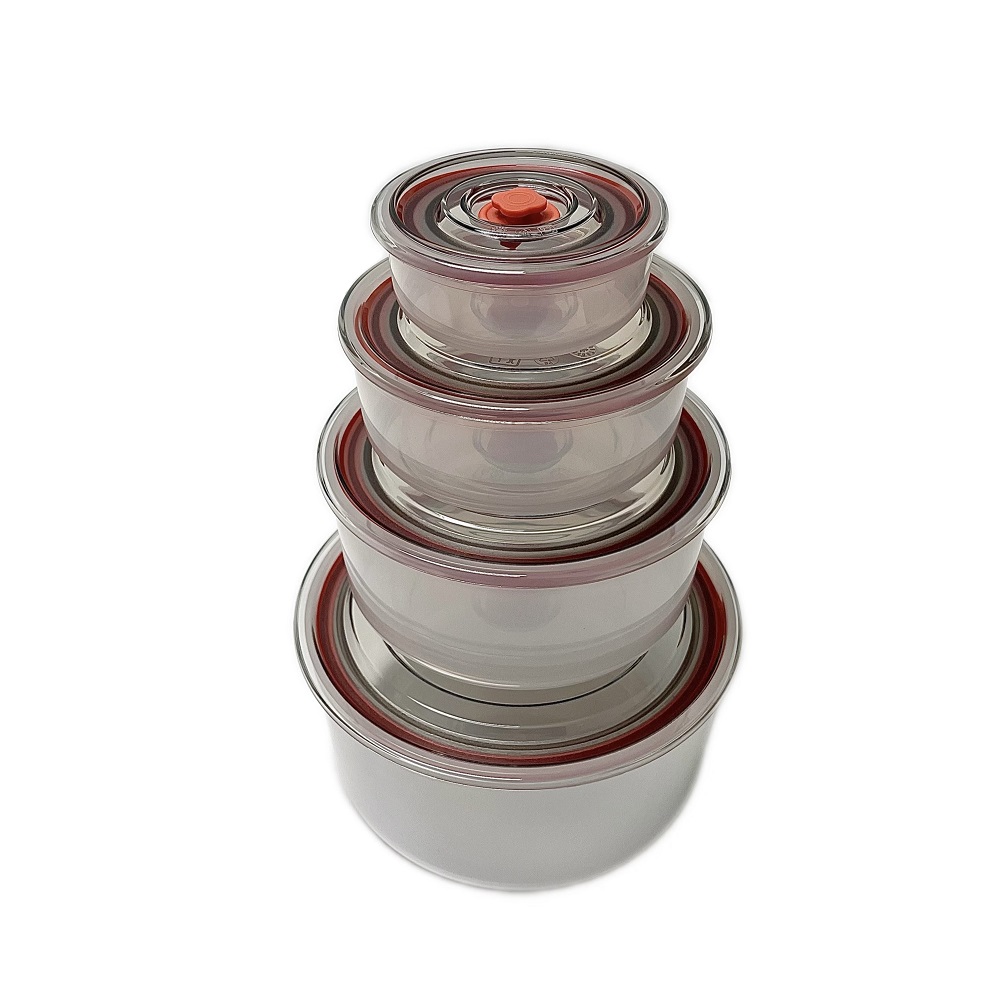
You must validate liquid transport capabilities using the inversion test. This is a non-negotiable step for any operation moving soups, sauces, or marinades. Follow this protocol to test your inventory:
Fill the container halfway with water colored with a single drop of food dye for visibility.
Secure the lid and apply a full vacuum using your pump.
Wipe the outside of the container completely dry with a microfiber cloth.
Invert the container and place it upside down on a dry white paper towel.
Leave it in this position for exactly 10 minutes.
Inspect the paper towel for any moisture or dye transfer.
Even a single drop indicates a micro-leak. This is a critical evaluation dimension for commercial catering. High-volume takeout operations cannot afford transit spills. A compromised seal will leak hot liquids over other packages. Your takeout catering containers must pass this inversion test flawlessly to ensure safe, mess-free delivery.
You need a framework for testing long-term seal viability. Apply a full vacuum to an empty container. Document the exact time on a piece of tape. Monitor the valve dimple and lid deflection at 12, 24, and 48-hour intervals. Do not open the container during this period.
Commercial-grade containers should show zero pressure loss at 48 hours. The valve must remain deeply depressed. Unacceptable pressure loss rates show up as a flattening valve within the first 12 hours. If a container loses its vacuum overnight, it is unfit for long-term storage. You must cycle out containers that fail the 48-hour retention benchmark. Do not trust them with high-value ingredients like raw proteins or delicate greens.
Auditory confirmation provides immediate proof of a good seal. When you are ready to open the container, press the release valve. You should hear a distinct, sharp hissing sound. This sound is ambient air rushing rapidly back into the low-pressure environment.
A loud hiss means the vacuum remained strong throughout the storage period. A weak hiss indicates a slow leak occurred during storage. If you press the valve and hear absolutely nothing, the seal failed completely hours or days ago. The acoustic test tells you the historical integrity of the seal right before you consume the food. Train your prep cooks to listen for this sound every time they open a container.
Establish strict operational guidelines for handling failed containers. If a container fails the visual, tactile, or acoustic tests, you must treat the contents as compromised. Do not assume the food is safe just because it was refrigerated. Anaerobic bacteria can thrive if the temperature fluctuates, and aerobic bacteria will multiply rapidly once the vacuum fails.
Emphasize the golden rule of food safety. If a container appears to have lost its vacuum prematurely, do not taste the food to test for spoilage. Tasting compromised food introduces severe health risks. Discard the contents immediately to prevent foodborne illness. Never gamble with suspect seals in any food service environment. The cost of discarded food is always lower than the cost of a foodborne illness outbreak.
Microscopic food particles disrupt the airtight barrier. A single grain of salt, a smear of grease, or a drop of liquid on the container rim creates a micro-channel. Air will slowly travel through this channel and destroy the vacuum over a period of hours. The silicone gasket cannot seal against debris.
You must implement strict wiping protocols before sealing. Use a clean, damp cloth to wipe the entire rim of the base. Wipe the exposed silicone gasket on the lid. Ensure both surfaces are completely dry before applying the pump. Clean contact points guarantee maximum gasket compression and a flawless seal. Make rim-wiping a mandatory step in your kitchen's prep manual.
Commercial dishwashers and microwaves degrade plastic polymers over time. Polypropylene (PP) and standard polycarbonate experience material fatigue from repeated thermal shock. High heat causes the plastic to expand. Rapid cooling causes it to contract.
This cycle leads to micro-warping of the container rim. A warped rim is no longer perfectly flat. When you apply the lid, the gasket experiences uneven pressure. Some sections compress tightly, while others barely touch the rim. This uneven pressure causes eventual vacuum failure. You must hand-wash lids and avoid microwaving bases on high heat to prolong structural integrity. If a base shows visible warping, discard it immediately.
You must understand the concept of headspace in vacuum sealing. Headspace is the empty gap between the top of the food and the bottom of the lid. You must leave at least one inch of headspace in every container. Do not pack food all the way to the rim.
Overfilling creates massive risks. As the pump extracts air, it can draw liquid or fine powders upward. If liquid gets sucked into the one-way silicone valve, it permanently compromises the seal mechanism. The valve becomes sticky and fails to close properly. Always respect headspace requirements to protect the valve assembly. If you are sealing fine powders like flour or spices, place a small piece of parchment paper over the food before applying the lid to prevent particle aspiration.
You must evaluate the extraction tools. Manual hand pumps offer portability but lack consistency. The final pressure depends entirely on user strength and patience. Automated electric vacuum sealers provide rapid, consistent pressure levels. They remove human error from the extraction process and guarantee a uniform vacuum across all containers.
Address equipment limitations carefully. Check the duty cycle of electric pumps before purchasing. Consumer models often require 20-minute cooldowns between seals to prevent motor burnout. This is useless in a commercial setting. You need continuous-duty pumps capable of sealing dozens of negative pressure food containers back-to-back without overheating. Look for pumps with heavy-duty internal compressors designed for high-volume environments.
Evaluate the trade-offs between standard plastics and advanced co-polyesters. Standard BPA-free plastics are cost-effective but absorb odors and stain easily. They also flex heavily under strong vacuums. This flexing can eventually cause hairline cracks along the base corners.
High-durability co-polyesters, like Tritan, offer superior structural rigidity. They resist aggressive stains from tomato sauces and turmeric. They do not retain pungent odors like garlic or onions. Most importantly, they maintain their exact shape under sustained negative pressure. Investing in rigid materials prevents the micro-warping that destroys seals. Your Vacuum Plastic Food Containers must withstand daily abuse without losing their structural geometry.
Assess how easily you can integrate these systems into high-throughput environments. Look for stackability. Containers must nest securely when empty and stack safely when full. Modular sizing ensures efficient use of walk-in cooler space. You also need guaranteed availability of replacement gaskets and valves. You should not have to replace an entire container just because a silicone valve tore during cleaning.
Standardize your inventory. Mixing proprietary lid styles causes chaos. Staff will force snap-clasp lids onto lug-style bases. This user error creates false seals and ruins inventory. Buy a single, unified system of vacuum plastic food containers to streamline staff training and eliminate compatibility mistakes. A unified system allows any lid of a specific size to fit any corresponding base perfectly.
Take the following steps to ensure your food storage systems remain airtight and secure:
Audit your current inventory by performing the 48-hour pressure retention test on a random sample of containers.
Implement a mandatory rim-wiping protocol for all kitchen staff before sealing any container.
Discard any plastic bases that show signs of thermal warping or hairline cracks.
Standardize your procurement to a single brand of rigid, co-polyester containers to prevent lid mismatching.
Train all personnel to listen for the acoustic hiss when opening containers to verify historical seal integrity.
A: High-quality containers should maintain a strong vacuum for 1 to 2 weeks. Environmental factors, such as temperature fluctuations and humidity, can impact this duration. Always check the valve depression before assuming the seal is still active.
A: Thermal contraction causes this issue. As the air inside cools, it shrinks. These pressure changes can cause rigid plastics to shift slightly. This shifting can break the micro-seal if the silicone gasket is inflexible, worn out, or dirty.
A: No. Steam creates false pressure readings during extraction. As the hot food cools, it creates heavy condensation. This moisture can interfere with the valve mechanism and ruin the seal. Always cool food to room temperature before applying a vacuum.
A: Start by removing and washing the silicone gasket in warm soapy water. Check the container rim for hairline cracks or debris. Ensure the one-way valve is completely free of grease or food particles. Dry everything thoroughly before reassembling.
A: Use thermal expansion safely. Dip just the lid and rim of the container into a warm water bath for a few minutes. The heat causes the plastic to expand slightly and increases internal pressure. This safely breaks the stubborn seal without damaging the container.
A: Yes, they are highly reusable. However, their lifespan depends heavily on proper maintenance. Avoid high-heat commercial dishwashers and microwaves, which warp the plastic. Hand wash the lids and replace the silicone gaskets when they become stiff or brittle.


