
English 

Views: 0 Author: Site Editor Publish Time: 2026-09-24 Origin: Site


Moving frozen meals directly into a high-heat environment presents a severe physical challenge for kitchenware. Operational efficiency in meal prep relies on seamless transitions from storage to reheating. However, moving glass directly from sub-zero temperatures to high heat introduces significant physical risks. Misunderstanding material limits leads to catastrophic failure, ruined food, and immediate safety hazards. Users switch to glass to avoid microplastics and chemical leaching. Yet, you must differentiate between marketing claims of "microwave safe" and the physical realities of extreme temperature transitions. Establishing a strict framework for evaluating glass types, lid venting mechanisms, and thermal shock thresholds is necessary. This ensures you can safely implement freezer-to-microwave workflows without shattering containers or compromising food safety.
Material dictates performance: Only borosilicate glass is engineered to reliably withstand the rapid temperature shifts of freezer-to-microwave transitions without shattering.
Thermal shock is the primary failure point: Standard tempered (soda-lime) glass is highly susceptible to thermal shock and requires a staging period before reheating.
Lid architecture matters: The choice between silicone valve glass containers and valve free glass containers dictates whether a container can remain sealed during the microwave heating process to prevent moisture loss and steam build-up.
Verification over assumptions: "Microwave safe" labels indicate the material will not melt or leach chemicals, but they do not guarantee immunity to rapid temperature changes.
Understanding thermal shock dictates how we handle kitchen equipment. Thermal shock occurs when a material experiences a sudden, extreme change in temperature. This causes different parts of the object to expand or contract at different rates. When evaluating Glass Food Storage Containers, this physical phenomenon determines whether a dish survives the journey from a 0°F freezer to a 1000-watt microwave.
Glass acts as a thermal insulator. It does not conduct heat well. When you place a frozen glass container into a microwave, the appliance uses dielectric heating. Microwaves target liquid water molecules. Because frozen water is largely transparent to microwave radiation, the appliance primarily heats the melted moisture on the surface of the food and the glass itself.
The exterior layer of the glass heats up rapidly and expands. Meanwhile, the interior layer remains in direct contact with the frozen core and stays contracted. This uneven thermal expansion creates immense tensile stress within the molecular structure. Stress points naturally concentrate in specific geometric areas. The corners and the base, where the walls meet the floor of the container, bear the brunt of this physical strain.
If the tensile stress exceeds the structural strength of the glass, a microscopic crack propagates at the speed of sound. The result is a sudden, violent shatter. This failure is not a manufacturing defect. It is a fundamental law of thermodynamics acting upon a rigid material.
The Coefficient of Thermal Expansion (CTE) measures how much a material expands per degree of temperature increase. A lower CTE means the material expands less when heated. This makes it significantly more resistant to thermal shock. Establishing an evidence-based baseline for safety claims requires comparing the CTE of different glass types used in food storage.
Glass Material | Coefficient of Thermal Expansion (CTE) | Thermal Shock Resistance (ΔT) | Freezer-to-Microwave Safety |
|---|---|---|---|
Borosilicate Glass | ~3.3 × 10⁻⁶ /°C | Up to 165°C (329°F) | High - Safe for direct transition |
Tempered Soda-Lime Glass | ~9.0 × 10⁻⁶ /°C | Around 50°C - 60°C (122°F - 140°F) | Low - Requires staging/thawing |
Standard (Untempered) Glass | ~9.0 × 10⁻⁶ /°C | Less than 40°C (104°F) | Unsafe - High risk of shattering |
This data illustrates why material composition is the deciding factor in kitchen safety. A container with a high CTE physically distorts under rapid heating. A low-CTE container maintains its structural integrity regardless of the temperature swing.
Modern glass food storage containers generally fall into two primary material categories. Both offer distinct health benefits over plastic. They eliminate the risk of microplastic ingestion and chemical leaching. However, their performance under extreme temperature transitions varies drastically.
Borosilicate glass achieves its remarkable thermal resistance through its chemical composition. Manufacturers incorporate at least 5% boron trioxide into the silica and soda ash mixture. This creates a glass with a very low CTE. The boron acts as a binding agent. It prevents the silica molecules from shifting dramatically when exposed to heat.
This material has a long historical use in laboratory environments. Test tubes and beakers rely on it because it handles a Bunsen burner without failing. High-end kitchenware utilizes the same chemistry. Borosilicate presents a higher upfront cost. However, it yields a significantly lower replacement rate. It survives the daily abuse of rapid temperature shifts in heavy-duty meal prep environments.
For meal prep applications, borosilicate serves as a premium, non-toxic alternative. It guarantees zero chemical leaching under high microwave heat. You can confidently pull a frozen block of chili from a deep freeze and place it directly into a microwave on high power. The glass warms evenly without fracturing.
Tempered soda-lime glass dominates the consumer market due to lower production costs. The manufacturing process involves heating standard soda-lime glass to around 600°C. Manufacturers then rapidly cool the exterior with forced air. This process, known as quenching, puts the outer surfaces into compression and the interior into tension.
This treatment makes the glass highly resistant to physical impact. It is less likely to break if dropped on a hard floor. However, tempering does not improve thermal shock resistance. The underlying CTE remains high.
Taking tempered glass directly from 0°F (-18°C) to microwave high heat introduces severe risks. The rapid expansion of the outer layer fights against the internal tension created during the tempering process. This often results in an explosive shatter. The glass breaks into thousands of small, blunt cubes. Many common consumer brands utilize soda-lime glass. If you read their specific manufacturer warnings, you will find strict guidelines against sudden temperature shifts. They explicitly state that their products should not go directly from the freezer to a high-power microwave setting.
Property | Borosilicate Glass | Tempered Soda-Lime Glass |
|---|---|---|
Primary Additive | Boron Trioxide | Sodium Carbonate (Soda Ash) |
Impact Resistance | Moderate | High |
Thermal Shock Limit | 165°C (329°F) | 60°C (140°F) |
Failure Mode | Cracks into large shards | Shatters into small cubes |
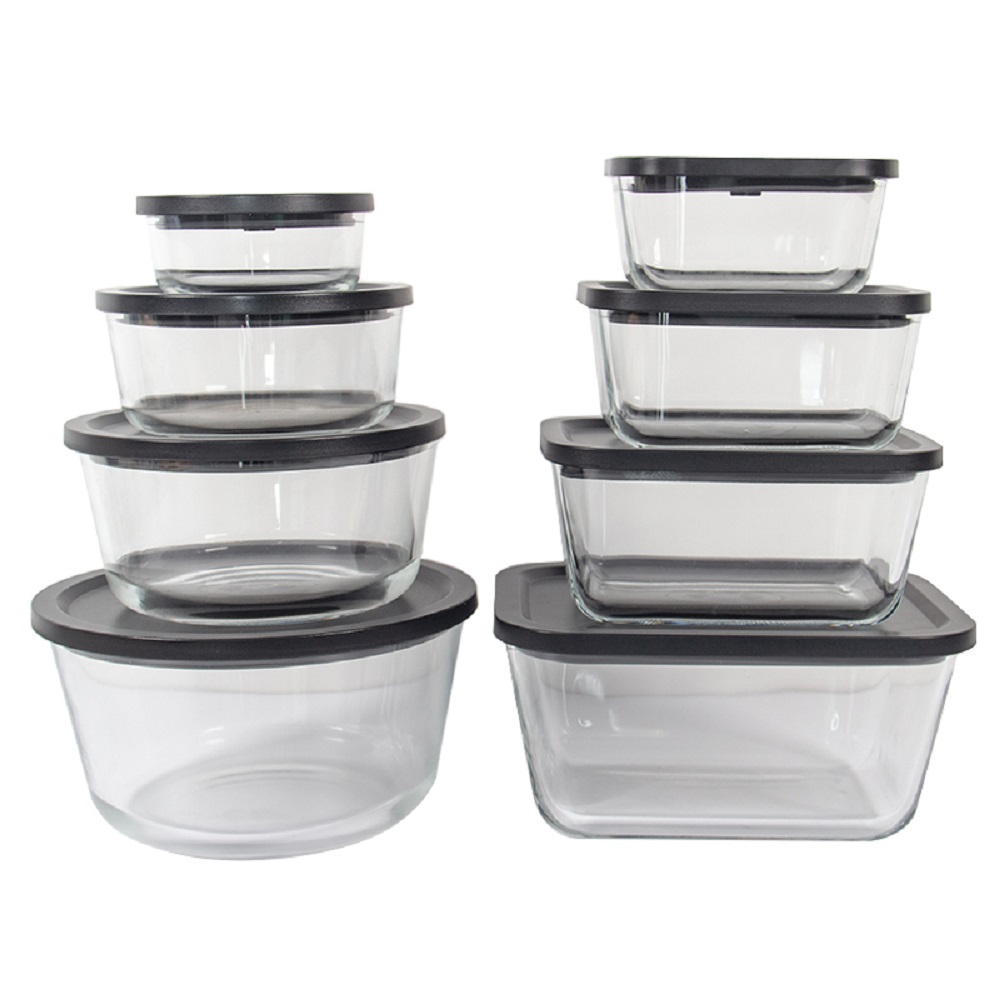
Assessing how lid design impacts the reheating phase of frozen foods is just as critical as evaluating the glass itself. The lid controls moisture retention, pressure management, and splatter prevention during the microwave cycle.
When frozen food heats, ice converts to water and then rapidly to steam. In a completely sealed environment, this steam creates immense internal pressure. This pressure can blow the lid off or damage the container. silicone valve glass containers solve this mechanical problem through built-in venting systems.
These built-in silicone valves regulate internal pressure during rapid reheating. Before microwaving, you simply pop the valve open. This allows steam to escape at a controlled rate while keeping the lid firmly latched. The primary benefits include retaining moisture within the food. It prevents rice or pasta from drying out while entirely preventing steam explosions.
Evaluating the longevity and cleaning requirements of these valves is necessary. Food particles and starches accumulate in the valve housing. Routine maintenance requires popping the silicone valve out of its seating. You must wash it thoroughly to prevent bacterial buildup. High-quality silicone withstands repeated dishwasher cycles without degrading or losing its seal.
For environments prioritizing streamlined cleaning, valve free glass containers offer a different set of operational parameters. Because these lids lack a pressure-release mechanism, they cannot remain fully sealed during the microwave process.
You must unlatch or completely remove the lids on valve-free containers before microwaving. Leaving a solid, unvented lid locked in place over frozen food guarantees a pressure blowout. The trade-offs here are clear. You benefit from simpler cleaning with fewer moving parts. There are no hidden crevices for bacteria.
However, you introduce the need for secondary splatter guards. You will often need to rest the lid loosely on top of the glass. Alternatively, you must use paper towels or dedicated microwave covers to keep the appliance clean during the rapid boiling phase of reheating.
Lid Type | Microwave Protocol | Moisture Retention | Maintenance Level |
|---|---|---|---|
Silicone Valve | Leave latched, open valve | Excellent | Moderate (requires valve cleaning) |
Valve Free | Unlatch and rest loosely | Fair | Low (simple wipe down) |
Analyzing the safety of microwaving the lids themselves reveals stark differences in material compliance. Even if the glass base is borosilicate, the lid must handle the ambient steam heat.
Differentiating between BPA-free plastics and high-grade food-safe silicone is vital. BPA-free plastic lids, often made of polypropylene, are generally labeled microwave safe. However, they have lower melting points than silicone. Under prolonged microwave exposure, plastic lids warp, blister, or degrade. This is especially true if they rest against high-fat foods that reach temperatures exceeding boiling water.
High-grade food-safe silicone withstands temperatures up to 400°F (204°C). Whether used as a gasket or the entire lid, silicone maintains structural integrity without chemical transfer.
Auditing and selecting the right containers for long-term meal prep scalability requires looking past marketing jargon. You must examine the physical attributes of the glassware directly.
Understanding the specific meanings of safety labels prevents costly mistakes in the kitchen.
Freezer-Safe indicates the material will not become brittle and crack at sub-zero temperatures.
Microwave-Safe means the material is transparent to microwaves and will not melt, spark, or leach toxins when heated.
Oven-Safe means the container withstands sustained high ambient heat, usually up to 450°F.
"Microwave-Safe" does not automatically mean "Freezer-to-Microwave Safe." A tempered glass bowl is microwave safe at room temperature but shatters if microwaved from frozen. To verify capabilities, locate physical embossed stamps on the bottom of the glassware. Do not rely on discarded packaging claims. Look for specific temperature variance ratings (ΔT) or the word "borosilicate" molded directly into the glass.
Container shape impacts thermal stress distribution. Round containers handle rapid temperature changes better than rectangular ones. Sharp 90-degree corners create natural stress concentrations. Thermal expansion forces collide in these corners, making rectangular containers slightly more vulnerable to thermal shock if manufactured from inferior glass.
Glass thickness affects both insulation in the freezer and heat penetration in the microwave. Thicker glass provides better durability against physical drops. However, it requires more time for microwaves to penetrate and heat the food evenly. It also holds heat longer, requiring caution when removing the container from the microwave.
Address aesthetic treatments like frosted glass or tinted finishes carefully. Verify that these coatings are integrated into the glass matrix rather than applied as external films. External films peel, blister, or release odors when exposed to microwave radiation or the harsh detergents of a commercial dishwasher.
Follow these inspection steps when evaluating new containers:
Check the bottom stamp for the borosilicate designation.
Inspect the corners for uniform glass thickness.
Verify the lid gasket is removable for deep cleaning.
Ensure the venting mechanism operates smoothly without excessive force.
Regardless of the glass type you procure, implementing actionable protocols prevents container failure and ensures consistent food quality.
If you utilize tempered soda-lime glass, you must establish a standard operating procedure for thawing. Never bypass this step. Move the frozen container to the refrigerator for 12 to 24 hours before reheating.
If rapid thawing is required, utilize a cold-water bath. Submerge the bottom of the sealed container in tap water for 15 minutes. This slowly raises the surface temperature of the glass above freezing before introducing it to the microwave.
Even with borosilicate glass, staged reheating yields better culinary results and reduces unnecessary stress on the material. Utilize the defrost setting for the first few minutes. This allows the ice to convert to water gradually. It creates a liquid base that helps distribute heat evenly.
Stirring food midway is non-negotiable. Microwaves heat unevenly, creating boiling hot spots next to frozen blocks. These extreme temperature differentials within the food transfer directly to the glass, causing localized thermal stress. Stirring eliminates these cold spots and normalizes the internal temperature.
Reheating Phase | Microwave Power Level | Duration | Action Required |
|---|---|---|---|
Phase 1: Defrost | 30% - 50% | 2 - 4 minutes | Leave lid vented or loose |
Phase 2: Equalize | 0% (Pause) | 1 minute | Stir food thoroughly |
Phase 3: Heat | 80% - 100% | 1 - 3 minutes | Monitor for steam release |
The physical expansion of freezing liquids causes many glass containers to fracture in the freezer before they ever reach the microwave. Water expands by approximately 9% when frozen. Soups, broths, and heavy sauces require careful volume management.
Different foods expand at different rates. High-fat foods like chili expand less than high-water foods like chicken broth. Adjust your fill lines accordingly. A standard rule is to leave 1.5 inches of headspace for pure liquids and 1 inch for dense stews.
Long-term deep freezing creates harder, more expansive ice blocks than short-term chilling. Always leave adequate headspace. Fill containers no more than 80% full. This allows the liquid to expand upward rather than pushing outward against the rigid glass walls.
The risk of thermal shock does not end when the microwave stops. Reverse thermal shock occurs when moving a hot container from the microwave directly into cold dishwater or onto a cold granite countertop. The rapid contraction of the heated glass causes immediate fracturing.
Establish best practices for the cooling phase. Place hot glass containers on a wooden cutting board, a silicone trivet, or a dry cloth towel. Allow the containers to cool to room temperature before placing them in the sink or the dishwasher. This ensures long-term structural integrity and maximizes the lifespan of your storage investment.
Audit your current kitchen inventory by checking the manufacturer stamps embossed on the bottom of containers to identify material limits.
Discard any compromised, scratched, or chipped glass immediately to prevent thermal shock fractures during reheating.
Upgrade to thermal-shock-rated borosilicate systems for high-volume meal prep to eliminate the need for overnight thawing.
Select vented silicone lids for sealed moisture retention or valve-free lids for streamlined cleaning based on your daily workflow.
A: Check the bottom of the container for embossed lettering. Borosilicate containers explicitly state "borosilicate" or show an oven-safe temperature rating above 400°F. Tempered glass features brand names associated with soda-lime production and includes warning labels against sudden temperature changes.
A: "Microwave-safe" means the material will not melt or leach chemicals under microwave radiation. It does not mean it resists thermal shock. If made of tempered soda-lime glass, the rapid expansion of the heated exterior against the frozen interior caused it to shatter.
A: You should only microwave with the lid on if it features a venting mechanism like a silicone valve, and the valve is open. Solid, unvented plastic lids must be removed or rested loosely on top to prevent steam pressure buildup and warping.
A: Tempered glass should thaw in the refrigerator overnight. If you must leave it on the counter, allow it to sit for at least 30 to 45 minutes until the glass reaches room temperature and condensation forms on the outside.
A: Yes. The defrost setting utilizes 30% to 50% power, pulsing the microwaves to allow heat to conduct through the food slowly. This reduces extreme temperature gradients against the glass, significantly lowering the risk of thermal shock.
A: Standard untempered glass handles a temperature difference of about 104°F (40°C). Tempered soda-lime glass handles up to 140°F (60°C). Borosilicate glass handles sudden shifts up to 329°F (165°C), making it the only safe option for direct freezer-to-microwave transitions.
A: They are safe only if the frosting or tinting is integrated into the glass manufacturing process. Applied external films or paints blister, peel, or release toxic fumes when exposed to high microwave heat or rapid freezing.


